AI Agent Component Spec
AI Agent Component Spec
- Package:
@cometchat/chat-uikit-react—npm install @cometchat/chat-uikit-react+npx astro add react - Required setup:
CometChatUIKit.init(UIKitSettings)thenCometChatUIKit.login("UID")— must complete before rendering - SSR: CometChat requires browser APIs — use
client:only="react"directive on Astro islands - Init code:
new UIKitSettingsBuilder().setAppId("APP_ID").setRegion("REGION").setAuthKey("AUTH_KEY").build() - Framework: Astro (this page) | React.js | Next.js | React Router
- All components: Components Overview
- Using the CometChat JavaScript SDK directly for framework-agnostic control
- Using the CometChat React UI Kit via the
@astrojs/reactintegration to get prebuilt, themeable chat UI

Prerequisites
Before installing the CometChat SDK or UI Kit, create a CometChat application in the CometChat Dashboard. The dashboard provides core services including:- User Management
- Group Chat & Messaging
- Voice & Video Calling
- Real-time Notifications
To initialize CometChat you need the following from your application:Keep these ready for the configuration steps below.
- App ID
- Auth Key
- Region
Register & Set Up CometChat
Follow these steps to register and prepare your environment.Step 1: Register on CometChat
Sign up or log in to the CometChat Dashboard. 🔗 Sign in to CometChatStep 2: Get Your Application Keys
Create a new app and copy your credentials:- Go to your App → Credentials
- Note the App ID, Auth Key, and Region
Each CometChat application can power a single client app. Users in the same app can chat across platforms (web and mobile).
Step 3: Set Up Your Development Environment
Make sure your system meets these requirements:- Node.js installed
- A code editor like Visual Studio Code or Cursor
- npm, pnpm, or Yarn
Built With
The Astro integration relies on the following technologies:| Technology | Description |
|---|---|
| Node.js | JavaScript runtime environment |
| npm | Package manager |
| Astro | Web framework for content-focused sites |
| @astrojs/react | Optional: React integration for using CometChat React UI Kit |
Getting Started
Step 1: Create an Astro Project
- npm
- pnpm
- yarn
Step 2: Install Dependencies
Choose one of the following:- JavaScript SDK only (maximum control)
- React UI Kit (prebuilt UI) with Astro’s React integration
- Install CometChat UI Kit
- Add React to Astro
Create a
.env file at the project root and add the following environment variables used by the examples:Step 3: Initialize CometChat (UI Kit)
Use a shared initializer that reads from environment variables and initializes the React UI Kit. This pattern matches the example projects.Replace placeholders with your actual CometChat credentials before testing.
Step 4: User Login
The example islands handle login automatically usingensureLogin(uid) from src/lib/cometchat-init.js. Configure PUBLIC_COMETCHAT_LOGIN_UID (and PUBLIC_COMETCHAT_TARGET_UID for one-to-one) in your .env.
- Auth Key is suitable for POCs and early testing.
- In production, prefer an Auth Token issued by your backend.
Test UIDs you can use immediately:
cometchat-uid-1, cometchat-uid-2, cometchat-uid-3, cometchat-uid-4, cometchat-uid-5.Step 5: Choose a Chat Experience
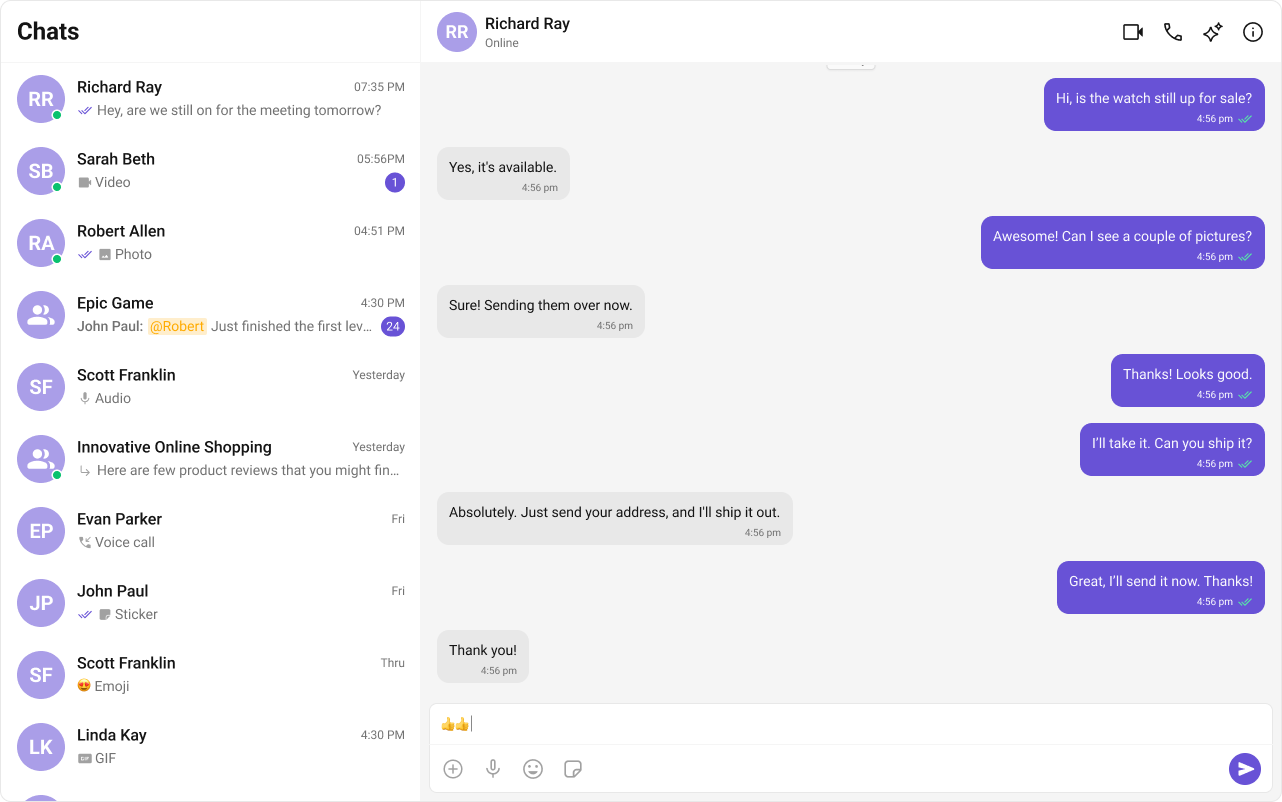
Integrate a conversation view that suits your application’s UX requirements. Below are the available options:1️⃣ Conversation List + Message View
Best for: Applications that need a two-panel layout, such as web-based chat interfaces (e.g., WhatsApp Web, Slack). Features:- Two-panel layout – Displays the conversation list on the left and the active chat window on the right.
- One-to-one & group conversations – Seamless switching between private and group chats.
- Multiple conversations – Effortlessly switch between different chat windows.
- Easy navigation – Intuitive UI for finding and accessing chats quickly.
- Tap-to-view on mobile – In mobile layouts, tapping a conversation opens the Message View, optimizing space.
- Real-time updates – Auto-refreshes messages and conversation lists.
- Message sync – Ensures messages stay updated across all sessions and devices.
- Desktop-first applications
- Apps requiring a rich user experience with seamless navigation
- Platforms supporting both individual and group messaging
- Mobile-friendly apps needing a tap-to-open message view
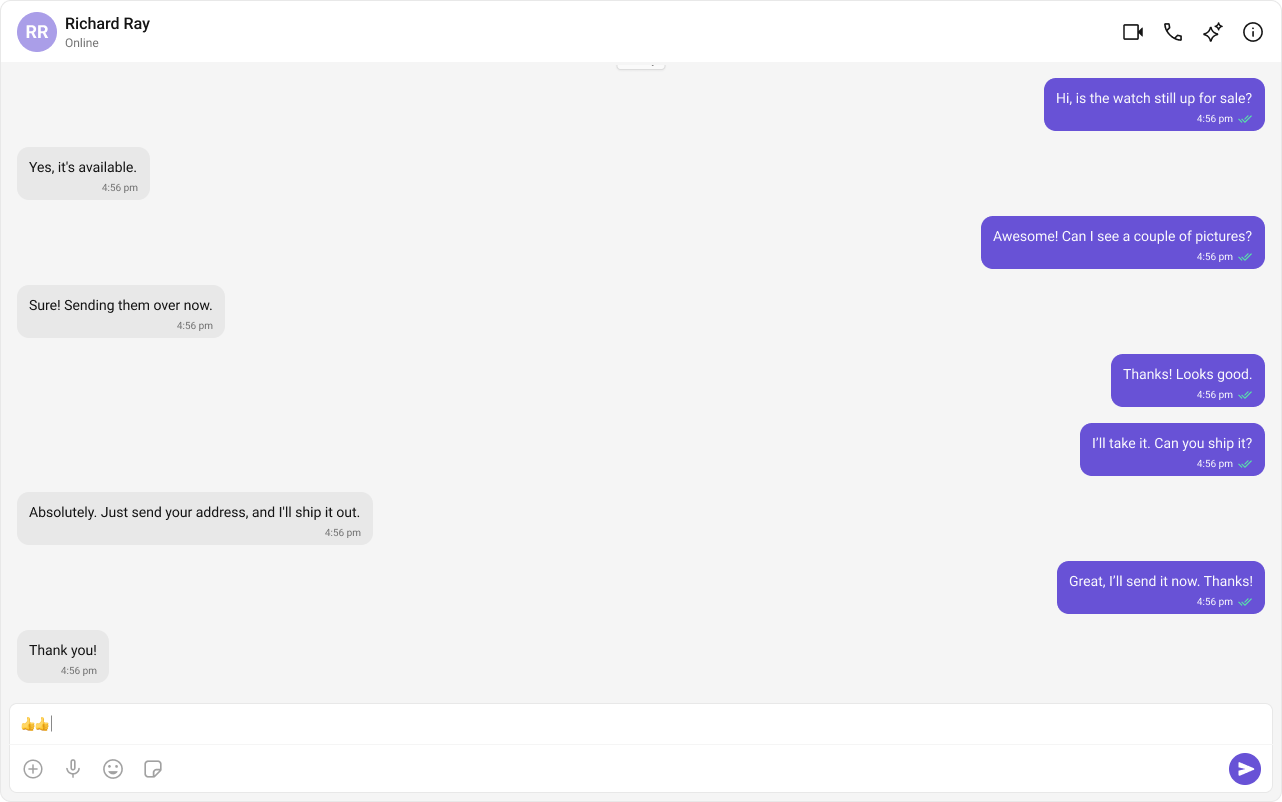
2️⃣ One-to-One/Group Chat
Best for: Apps that require a focused, direct messaging experience without a sidebar. Features:- Dedicated chat window – Ideal for one-on-one or group messaging.
- No conversation list – Users directly enter the chat without navigating through a list.
- Supports both One-to-One and Group Chats – Easily configurable with minor code modifications.
- Optimized for mobile – Full-screen chat experience without distractions.
- Seamless real-time communication – Auto-updates messages for a smooth experience.
- Ideal for support chat or community-based messaging.
- Support chat applications – Direct user-agent communication.
- Apps focusing on direct messaging – No distractions from other conversations.
- Community or group chat applications – A structured way to interact in groups.
- Mobile-first applications – Designed for compact and dedicated messaging experiences.
3️⃣ Tab-Based Chat Experience
Best for: Apps that need a structured, multi-feature navigation system for seamless interaction between chats, calls, users, and settings. Features:- Tab Navigation – Easily switch between Chat, Call Logs, Users, and Settings.
- Dedicated Chat Window – Full-screen messaging experience for focused communication.
- No Sidebar – Unlike multi-panel UI, this design prioritizes individual interactions.
- Unified Experience – Users can seamlessly manage conversations, call history, and settings from a single interface.
- Scalable for future features – Easily extend to include more functionalities such as notifications or contact management.
- Optimized for both desktop and mobile – Ensures a smooth experience across different screen sizes.

- Apps requiring structured navigation – Clearly separate chat, calls, and settings.
- Multi-feature chat apps – Supporting different functionalities in an organized way.
- Mobile-first applications – Ideal for apps needing tab-based UI for easy access to features.
- Support & enterprise chat solutions – Perfect for help desks, business chat platforms, and customer support apps.
Build Your Own Chat Experience
If you need full control, combine the JavaScript SDK with your own UI or mix Astro islands with select UI Kit components. Customize themes, behaviors, and data flows as needed. Key Areas to Explore:Common Failure Modes
Common Failure Modes
Common Failure Modes
| Symptom | Cause | Fix |
|---|---|---|
CometChatUIKit.init() fails silently | Invalid App ID, Region, or Auth Key | Double-check credentials from the CometChat Dashboard |
| Component doesn’t render | init() not called or not awaited before rendering | Ensure init() completes before mounting components. See Methods |
| Component renders but shows no data | User not logged in | Call CometChatUIKit.login("UID") after init |
| CSS/theme not applied | Missing CSS import | Add @import url("@cometchat/chat-uikit-react/css-variables.css"); in your global CSS |
| Blank screen after login | Component mounted before init/login completes | Use state to conditionally render after login resolves |
| CometChat components fail on server | Astro SSR tries to render on server | Use client:only="react" directive on CometChat islands |
| Auth Key exposed in production | Using Auth Key instead of Auth Token | Switch to Auth Token for production |
Next Steps
Proceed with your chosen experience:Conversation List + Message
Two-panel layout with conversation list and message view.
One-to-One Chat
Focused direct messaging experience without a sidebar.
Tab-Based Chat
Multi-tab navigation for chats, calls, users, and settings.
Advanced Customizations
Customize colors, fonts, and styles to match your branding.
You’ve set up CometChat in your Astro app. Initialize, log in, and render your preferred chat experience.